A robotic cleaner can seem autonomous until it stops beneath a chair, flashes a red warning, or leaves a dusty strip along the wall. When that happens, replacing the machine is rarely the best first move. A careful diagnosis often reveals a blocked brush, a dirty sensor, a weak battery, or a confused navigation map.
This guide explains how to troubleshoot a robotic cleaner through practical, safe checks. It follows the machine’s actual path: power, charging, movement, cleaning performance, navigation, and app communication. Each step focuses on visible clues, such as hair wrapped around the roller or a charging dock hidden behind furniture. Small details matter.
“Robots should do useful work,” says Colin Angle, co-founder of iRobot. That principle also shapes good troubleshooting. A cleaner should save effort, not create another daily chore. Yet some problems are not obvious. A device may appear fully charged but lose power under load. A spotless sensor can still produce poor navigation if the floor map is corrupted.
Expect a little trial and error. Even experienced owners can misread a warning light or skip a simple inspection. That is normal. The important point is to change one factor at a time and observe the result. This step-by-step approach reduces guesswork, protects the cleaner from unnecessary damage, and helps distinguish a routine maintenance issue from a fault requiring professional service.
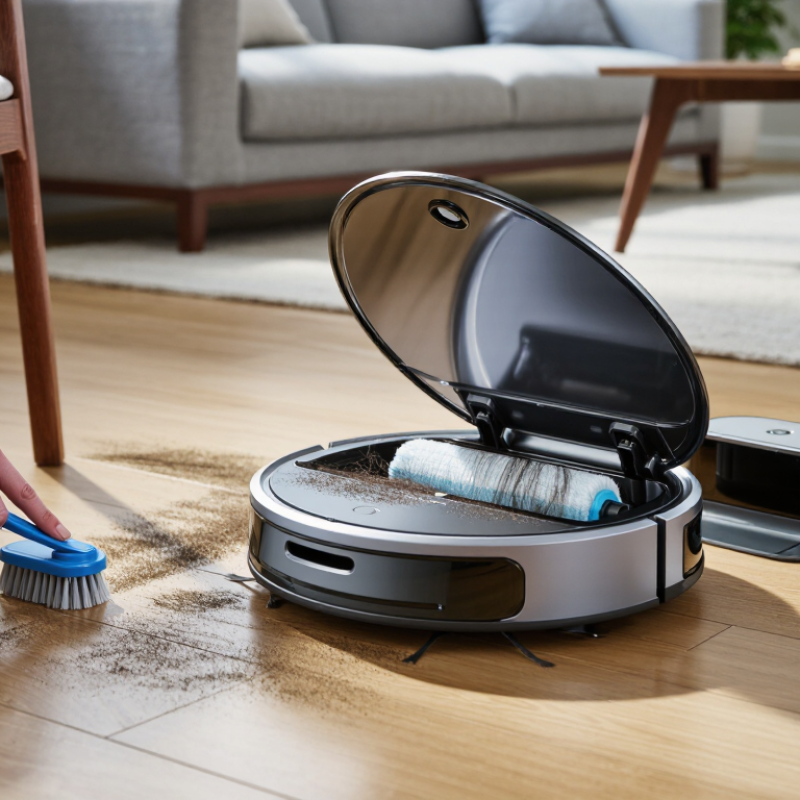
Before repairing a robotic cleaner, identify the exact symptom. Is it silent, stopping early, missing rooms, leaving debris, or avoiding the dock? Note the time, surface, battery level, and error signal. A blinking light is not a diagnosis.
The International Federation of Robotics reported approximately 6.4 million consumer service robots sold in 2023 in World Robotics 2024. More units mean more varied failure patterns, not simpler troubleshooting. Start with physical evidence. Check whether hair blocks the main brush, dust fills the filter, or a small object jams a wheel. Inspect the charging contacts for dark marks or residue. Then test the cleaner on a clear floor with strong lighting. If suction sounds normal but debris remains, the brush path may be restricted. If navigation fails near one area, remove reflective objects, loose cables, and unstable furniture nearby. Keep the test controlled.
My first diagnosis is often wrong. I once blamed the battery when dirty contacts caused repeated docking failures. Record each change, including cleaning the sensors and restarting the unit. Change one condition at a time. The Consumer Product Safety Commission’s incident-reporting guidance supports documenting product behavior, environment, and timing when investigating malfunctions. Do not open a sealed battery compartment or bypass a safety switch. If the cleaner overheats, smells burnt, or shows swelling, stop testing immediately. A short video can help qualified service personnel distinguish software behavior from mechanical failure.
Identify the cleaner’s symptoms and confirm the problem
Start with the most visible symptom, then confirm the cause before replacing parts. Check power and battery status first, inspect brushes and filters for blockages, clean the sensors and charging contacts, and verify the docking area is accessible. These checks help separate maintenance issues from possible component failures.
How to Troubleshoot a Robotic Cleaner Step by Step?
When a robotic cleaner stops, check its power before touching the controls. Press the power button and watch for lights or sounds. If nothing happens, inspect the outlet, adapter, and cable for damage. Try another safe outlet when possible. Keep your hands dry during this check. A loose connection is common. I once blamed the battery too quickly, but the real problem was an unplugged adapter.
Place the cleaner firmly on its charging dock. Its contacts should meet without gaps or visible dirt. Wipe the contacts with a dry, soft cloth. Then allow enough charging time before testing it again. A flashing indicator may show poor contact or a low battery. Avoid opening the battery compartment without proper training. Heat, swelling, or unusual smells require immediate professional attention.
Test the controls after charging. Check whether the start button responds and whether a schedule has paused cleaning. If a remote control or mobile interface is used, confirm its connection. Inspect the wheels and brushes for hair, threads, or small objects. Remove cords, wet patches, and fragile items from the floor. The cleaner may also stop on dark edges or uneven surfaces. If the fault repeats, record the lights, sounds, floor conditions, and timing. This information helps a qualified technician diagnose the issue more accurately. My earlier notes were incomplete, and that slowed the repair.
| Step | Troubleshooting Area | What to Check | Recommended Action | Expected Result | Safety Note |
|---|---|---|---|---|---|
| 1 | Power | Power switch, start button, and indicator lights | Confirm that the cleaner is switched on. Press the start button once and observe whether the status light or display changes. | The cleaner starts its normal boot sequence or shows a specific status indicator. | Keep hands away from moving parts. |
| 2 | Power | Battery charge level | Place the cleaner on its charging station or connect the supplied charger. Allow sufficient time for the battery indicator to show a charge. | The charging indicator appears and the battery level begins to increase. | Use the correct charger. |
| 3 | Charging | Electrical outlet and charger connections | Test the outlet with another low-power device. Check that the charger is firmly connected to the outlet, charging base, and cleaner. | The charging base receives power and the cleaner begins charging consistently. | Do not use damaged cables. |
| 4 | Charging | Charging contacts and docking alignment | Unplug the charger, then wipe the metal contacts on the cleaner and base with a dry, lint-free cloth. Reposition the cleaner so both contact points meet. | The charging symbol remains steady rather than repeatedly connecting and disconnecting. | Disconnect power before cleaning contacts. |
| 5 | Controls | Remote control, buttons, or mobile control connection | Replace weak remote batteries if applicable. Confirm that the cleaner is within control range and that wireless control is enabled. | Commands such as start, stop, or return-to-base are recognized without delay. | Stop the cleaner before lifting it. |
| 6 | Controls | Error code, warning light, or audible alert | Record the displayed message or alert pattern. Follow the corresponding corrective step in the user manual before restarting. | The warning clears and the cleaner resumes normal operation. | Do not bypass safety warnings. |
| 7 | Operating Conditions | Brushes, wheels, and suction inlet for blockage | Turn off the cleaner and remove hair, threads, dust, and debris from the main brush, side brushes, wheels, and intake opening. | Brushes rotate freely, wheels move smoothly, and suction performance improves. | Power off before removing debris. |
| 8 | Operating Conditions | Dust container, filter, or water reservoir | Empty the dust container, clean or replace the filter as permitted, and fill or drain the water reservoir according to the operating mode. | The cleaner operates without a full-container warning or reduced airflow. | Keep electrical parts dry. |
| 9 | Operating Conditions | Floor surface, thresholds, cables, and loose objects | Remove loose cords, small objects, and unstable mats. Check whether thresholds, dark surfaces, or uneven flooring prevent movement. | The cleaner moves forward without getting stuck or repeatedly reversing. | Clear the cleaning area first. |
| 10 | Operating Conditions | Cliff sensors, navigation sensors, and sensor windows | Wipe sensor windows with a soft, dry cloth. Make sure no tape, dust, or protective film covers the sensors. | The cleaner navigates normally and does not stop unnecessarily near edges or obstacles. | Avoid abrasive cleaners. |
| 11 | Reset and Retest | Temporary software or control-state issue | Stop the cleaner, switch it off, wait about 30 seconds, and restart it. If available, perform the standard reset described in the manual. | Temporary faults clear and the cleaner completes a short test cycle. | Save schedules or settings if required. |
| 12 | Further Assistance | Persistent fault after basic troubleshooting | Stop using the cleaner if it overheats, emits smoke, smells burnt, leaks, or repeatedly fails. Record the symptoms and arrange qualified service. | The issue is safely assessed without risking further damage or injury. | Do not open the battery or motor housing. |
When a robotic cleaner misses dirt or stops early, inspect the brushes before replacing parts. Turn the machine off and remove the main roller. Cut away wrapped hair, thread, and carpet fibers with small scissors. Check the side brushes for bent arms or loose screws. A brush can look clean but still drag against the floor.
Wash reusable filters only if their instructions permit it, then let them dry completely. A damp filter can restrict airflow and damage internal components. Tap disposable filters gently over a bin, rather than brushing them hard. I once blamed weak suction on the motor, but a packed filter caused the problem. That mistake reminded me to test simple causes first.
Wipe the navigation and drop sensors with a dry, soft cloth. Dust on these areas may cause random turns or sudden stops. Check each wheel for grit, pet hair, or uneven movement. Press them separately; they should spring back smoothly. Use a flashlight. Inspect the suction path from the intake opening to the dust container. Remove compacted debris carefully, without pushing it deeper. If airflow remains weak after cleaning, check for cracks, worn seals, or a blocked passage. I sometimes overlook the small intake flap, and that shortcut wastes time. Recheck it.
When a robotic cleaner stops working properly, repair one issue at a time. Remove hair from the main brush, clear the side brushes, and wipe the sensors with a dry microfiber cloth. Check the wheels for trapped threads. Inspect the filter and dust container for blockage. These small parts often cause weak movement or poor cleaning.
Test the cleaner after every repair or adjustment. Place it on a clear floor with a visible amount of dust nearby. Watch its start-up, turning, suction, and return to the charging station. Let the machine run for several minutes. A short test can reveal a loose brush or a wheel that still drags. I once changed several settings together and lost track of what fixed the problem. That was inefficient.
Tips
Keep a simple repair log. Write down the problem, the change, and the test result. Use the same floor area during each test. This makes differences easier to notice. If the cleaner behaves strangely, stop it and inspect the last part adjusted. Do not test near stairs, water, cables, or fragile objects. Test again after charging, because low power may imitate a mechanical fault. Check the cleaning path from different angles. The machine may appear normal while leaving narrow strips of dust. Controls are not always the real cause. Sometimes the floor surface changes the result.
A robotic cleaner often needs a simple check before professional help. Empty the dust bin, clean the filter, remove hair from the brush, and wipe the charging contacts with a dry cloth. Check whether the wheels turn freely. Then restart the unit and test it on a clear floor.
Do not keep testing it if you smell melting plastic, see smoke, hear repeated electrical clicking, or notice a swollen battery. Stop immediately.
The International Federation of Robotics reported nearly 20 million consumer service robots sold worldwide in 2023, increasing the need for safe, accessible support. Keep the model number, purchase date, error code, and a short video of the fault. These details can reduce unnecessary diagnostic time.
Contact the manufacturer when the cleaner is under warranty, the app shows a hardware fault, or replacement parts are unclear. Avoid opening the battery compartment or bypassing safety sensors. Seek a qualified repair professional when the unit overheats, repeatedly loses power, leaks liquid, or fails after cleaning and resetting. The European Commission’s repairability research highlights spare-part access and service information as major factors in extending product life. That matters in practice. I have seen users replace a working motor because a blocked wheel was never checked. My own troubleshooting can miss small causes too, especially after a rushed inspection. Get a written estimate before approving repairs.
Press the power button and watch for lights or sounds. Check the outlet, adapter, and cable. Try another safe outlet if needed. Keep your hands dry. A loose connection may be the real cause.
Place it firmly on the charging dock. The metal contacts should touch without gaps or visible dirt. Wipe them with a dry, soft cloth. Allow enough charging time before testing again. A flashing light may indicate poor contact or low power.
Do not open the battery compartment without proper training. Stop immediately if you notice heat, swelling, smoke, or unusual smells. Contact a qualified repair professional. Battery problems can be dangerous.
Check whether the start button responds. Review any paused schedule. Confirm the remote or mobile connection, if used. Controls are not always the cause. Low power or a blocked wheel may create similar symptoms.
Remove hair from the main brush and side brushes. Clear threads from the wheels. Wipe the sensors with a dry microfiber cloth. Empty the dust container and inspect the filter. Small blockages can cause weak movement or poor cleaning.
Repair one issue at a time. Use the same clear floor area with a small amount of visible dust. Watch start-up, turning, suction, and docking. Let it run for several minutes. Test gently.
Remove cords, wet patches, and fragile objects from its path. Dark edges and uneven surfaces may stop the machine. Check the cleaning path from different angles. A narrow strip of dust may reveal an overlooked problem.
Stop testing if you smell melting plastic, see smoke, hear repeated electrical clicking, or notice a swollen battery. Seek qualified help for overheating, liquid leakage, repeated power loss, or failed resets. Keep the model number, purchase date, error code, and a short fault video. Get a written estimate before approving repairs. I once blamed the battery too quickly. The adapter was unplugged.
Learning how to troubleshoot a robotic cleaner starts with identifying its exact symptoms, such as failure to start, weak suction, unusual noises, poor navigation, or repeated stops. Confirm when the problem occurs and check basic conditions, including the power supply, charging connection, control settings, scheduled programs, floor type, and any operating limits. A careful inspection should then cover the brushes, filters, sensors, wheels, and suction paths, since dirt, tangled hair, or blocked openings can affect performance. Clean or reposition components as needed, following the cleaner’s safety instructions.
After each repair or adjustment, test the cleaner in a controlled area to determine whether the issue has been resolved. Observe its movement, cleaning ability, charging behavior, and response to controls. If the problem continues, if a component appears damaged, or if electrical or internal repairs are required, stop using the device and contact the manufacturer or a qualified professional. This step-by-step approach to how to troubleshoot a robotic cleaner can help prevent unnecessary damage and support safe, effective maintenance.

NovaBot Robot